How To Make A Camping Pod
* We sometimes use affiliate links, so we may receive a commission, at no cost to you, if you make a purchase through a link. Check our disclosure for more info.
You may have heard the phrase ‘camping pod’ being thrown around the adventure community here and there. But what are they and where can they go? We’ve got a full guide right here if you’re wondering how to make a camping pod. Yay!
There are a few answers for these questions and we’re here to address them. For example, a camping pod is pretty much what it says on the tin and is part of the glamping experience. But there are also many different ways for how to make a camping pod depending on the type you choose.
So, the team at Camping Cubs are here to walk you through them. We’ll wander from definition to step-by-step in this little know-it-all blog.
Also see: Where to camp for free in the UK
What is Glamping?
The first part to knowing how to make a camping pod is always understanding why they’re even a thing.
It turns out, they’re becoming more and more of a trend across the UK. With people who typically wouldn’t want to get their wellies dirty on an adventure, dreams of a night spent under the stars is becoming ever closer (without close encounters with creepy crawlies, of course).
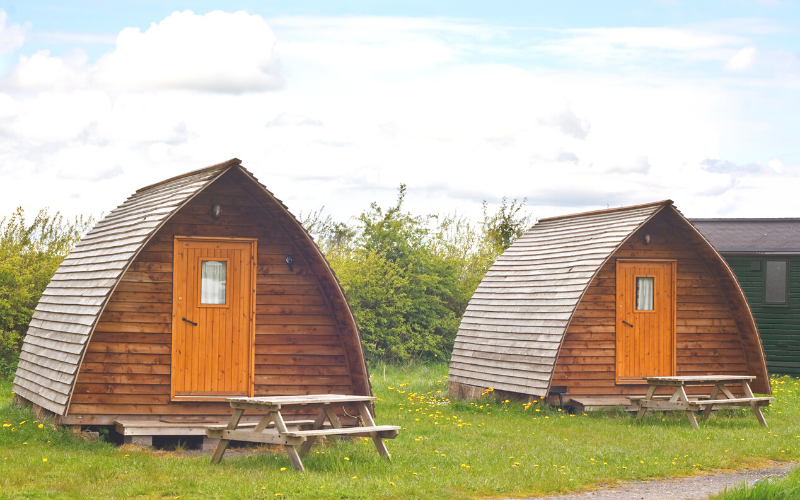
This is where glamping comes in. The idea is that a flat-pack glamping pod made of wood and other strong materials is used in place of a tent.
So, it’s a lot less portable and often requires a booking, but these camping alternatives give you a lot of space to manoeuvre. Some will even have a bathroom, kitchen and double bed awaiting your sore feet.
What Are the Types of Camping Pod?
There are actually three different types of camping pod out there. Some to suit more of a temporary pitch and others for a permanent fixture.
Cabin Pod
A cabin pod is more than probably what you think it is. If you’re an avid Airbnb traveller, you’ve probably stayed in one of these in your luxury travels.
They are on the larger side when it comes to the camping pod, are made of hardwood and will typically have some sort of eco-system helping to power the pod. For example, solar panels.
Glamping Dome
Also known as geodesic dome tents, a glamping dome is something you’ll come across when in temporary event locations. For example, tours around Britain’s beaches throughout low-tide seasons, music festivals, desert location experiences and more.
They’re a temporary fix for luxury accommodations. They are generally made of easy-to-assemble materials such as a steel-scaffolding and a UV-protected PVC tarp. Plus, many will have nice hard-wood flooring that is perfect for a fluffy rug.
Flat-Pack Glamping Pod
These kinds of camping pods are becoming more popular in the garden as people continue to spend a lot of time at home and in the greenery available on their doorstep! So, people have been experimenting.
The flat-pack glamping pod is the Swedish furniture of camping with a kit of wood and other materials being shipped over to you alongside a set of instructions and a with for luck. The best part is being able to choose your size and your interior.
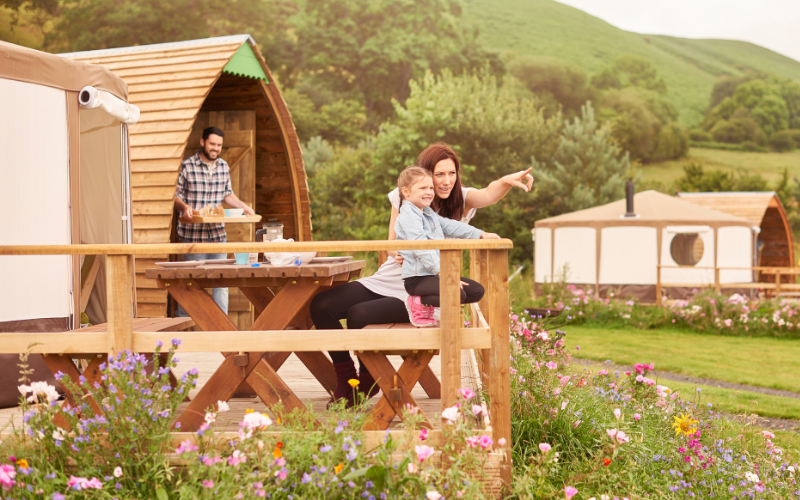
From having at at-home bar for friends and family to a personal sauna or games pod for the kids to enjoy on their half-wild quest.
Where Can a Flat-Pack Glamping Pod Go?
If you want to know how to make a camping pod, you’ve probably already got an idea of where you want to put it. However, it’s best to know where you can put it, in case you decide to start your camping architecture in a place that can get you in trouble.
For one, you’re only allowed to camp on sites where you have the landowner’s permission. Unless you’re headed for a wild camping escape in the highlands and lowlands of Scotland; in this case you can camp anywhere as long as you pitch late, pack-up early and leave no trace.
Really, setting the ground for a pop-up glamping pod isn’t something you can do while wild camping. As well as this, most camping sites might not be too friendly to some construction on their pitch disturbing other guests throughout their holiday trip.
So, that just leaves any land you own. This could be your garden or your field. Or even your own driveway.
Also see: How to refill a fresh water tank during your camping trip
Steps for How to Make a Camping Pod
When we’re walking through these steps, we’re really talking about those pop-up glamping pods that we mentioned earlier. This is because they’re typically the ones you can pop in your garden, in a field or wherever you want without needing to dig sites, lay foundations or hire any external contractors for the job.
In other words, we’re here to help you with how to make a camping pod that is temporary.
Order Online
Choose the shape of frame you want as your glamping pod. For example: there’s the dome, the gothic-inspired, the A-frame, the oval, the shepherd’s hut or the standard module.
Construct the Frame
Tap together the wood parts to create the arches and overall structure. Then, glue together in pairs for reinforced strength.

Nail-In the Floor
As part of your kit, you’ll receive all the wood you’ll need for a full frame. This includes the base structure. Hammer these together with a bit of glue and then use a nail gun for the external breathable membrane, the insulation and the internal chipboard layer.
Sort the Internal Cladding
Before anything else, nail-in your internal cladding. When knowing how to make camping pods that are tall, a hint is to use a forklift for the cladding and start from the inside out!
Thread the Electrical’s
Now you’ve got the internal cladding, you can thread the wires needed for heaters, lights and switches. Drill holes in the internal cladding where necessary and clip the wires to the cladding for stability (only horizontally and vertically!).
Complete the External Cladding and Lead Finishing
Now you’ve got the wiring done, you can add your insulation panels onto the walls. A tip is to use panels instead of rolls, so they don’t compress with time. Then, nail-in your external cladding and line the roof with lead finishing to keep it water-tight.
Chalk-Out Your Layout
Now you’ve got the entire shell of your flat-pack glamping pod sorted, you can get on with deciding your internal layout. With chipboard on the floor, it’s easy to use bars of chalk for this.
Install the Plumbing
After choosing where the toilet and kitchen will be (if you’re having either of them), you can start to feed the pipes in and around the pod.
Affix the Windows and Doors
With the walls done, you’ll want to keep the elements out. So, it’s time to get the windows and doors in. But be sure to sand and varnish the walls as well as sweeping out dust beforehand so you don’t end up with a lung infection.
Play with the Fixtures and Fittings!
Finally, you’re at the fun part of how to make a camping pod: it’s time to play around with fixtures and decorations. So, this means adding your bathroom kit, choosing your kitchen and putting the bed in place, too.
Now, you should have a fully functional flat-pack clamping pod ready for use! Of course, this can depend on how much you followed the instructions. It could be one nail away from still being flat-packed: who knows 🙂